This article was peer reviewed by Simon Codrington. Thanks to all of SitePoint’s peer reviewers for making SitePoint content the best it can be!
In a previous article, I demonstrated how to build a basic Gmail inbox and message viewing app using the Gmail JavaScript API. Today I'm going to enhance that app with email sending capability using Gmail's powerful back-end. We'll end up with a customizable app which can display recent messages, allow the composition of new messages and allow us to reply to specific messages.
It's not necessary to have read the previous article to follow along with this one (although it will give you a deeper understanding of the subject matter). As ever, the complete source code for this article can be found on our GitHub repo (in the folder 02 - Sending mail).
Enabling the Gmail API on Your Google Account
[author_more]
The first step is to set up the Gmail API on your Google account. This will allow us to create applications which utilise Gmail functionality. Since we last looked at the Gmail API, Google have changed the user interface for the API management console — so here's a quick update on how to create the necessary Gmail API credentials.
Navigate to the Google Developer Console and create a project. Clicking Create will take us to the new project dashboard interface. From here we need to pop out the hamburger navigation menu and choose API Manager, then in the sidebar on the left we need to choose Credentials, before clicking on the New credentials button on the following page.
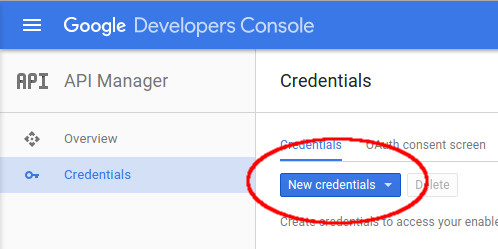
Now we need to create two sets of credentials: a browser API key and an OAuth client ID.
For the browser API key select API key then Browser key. On the following page we need only fill in the name field. However, for production I'd recommend adding a HTTP referrer (this will prevent abuse of our API key from non-authorized domains). Click Create and Google will generate an API key.
For the OAuth client ID, click once more on New credentials and select OAuth client ID. Select Web application as the application type and enter at least one authorized JavaScript origin. For a local development environment this will likely be http://localhost or similar. We do not need to enter an authorized redirect URI. Clicking Create will generate a client ID and client secret.
Once we've filled in the necessary fields we should be able to see our credentials back in the Credentials section. Keep this info open in a browser tab for the next step.
Initial Setup
Grab a Copy of the Code
Now that the API credentials are set up we should check out the source code of the existing demo application.
git clone git@github.com:sitepoint-editors/gmail-api-javascript-example.git
The folder 01 - Basic client contains the code from the previous article. This is what we're interested in.
Enter Our Credentials
And we should enter our credentials in index.html:
var clientId = 'xxxxxxxxxxxx-xxxxxxxxxxxxxxxxxxxxxxx.apps.googleusercontent.com';
var apiKey = 'xxxxxxxxxxxxxxxxxxxxxxxxxxxxxxxxxxxxxxx';
Tweak the Authentication Scopes
Finally, we should tweak the authentication scopes. Previously we required read-only access to the users' Gmail account. However, sending an email requires further permissions. Modify the scopes variable definition in the index.html as follows (note that the scopes variable is a space-separated string):
var scopes =
  'https://www.googleapis.com/auth/gmail.readonly '+
  'https://www.googleapis.com/auth/gmail.send';
As mentioned in the previous article, it's always best practice to request the bare minimum permissions when working with someone else's data — especially something as sensitive as their email account. These two scopes are all we need for this application. Strangely there is a similarly named scope (compose) which allows much greater access than we require.
Test That It's Working
Navigate to http://localhost/gmail-api-javascript-example (or wherever you have placed your index.html file). If things have gone according to plan, the application should ask us for authorization. Once it's been authorized, we should see something like this:
Sending an Email
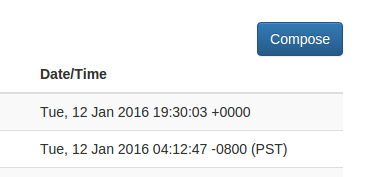
Now we've got the required permissions we can go ahead with the first step — tweaking the UI to add a compose button. This button will be positioned in the top right-hand corner of the interface (the pull-right Boostrap class helps with the positioning in this instance).
<a href="#compose-modal"
   data-toggle="modal"
   id="compose-button"
   class="btn btn-primary pull-right hidden">Compose</a>
The compose button is not displayed on the interface by default. This is so that it only appears once the user has authenticated. To enable this functionality we need to remove the hidden class from the element at the same time as we remove the hidden class from the table which displays the inbox. This means that we should amend our handleAuthResult() function to add the following just after the loadGmailApi() call:
Continue reading %Sending Emails with the Gmail JavaScript API%